MODULE 18 - ARCHERY BASICS
CHAPTER 1: GETTING STARTED IN ARCHERY

WHERE DO I EVEN START?
This can be one of the major obstacles that keeps many hunters from jumping into archery. There are so many brands and models of bows that just looking on a retail shelf can be overwhelming. Reading through forums or asking a question on social media will reveal just as many options – if not more! And once you settle on a bow that looks cool, you start getting bombarded with questions you have no clue how to answer: what is your draw length? What is your draw weight? How much “let-off” do you want?
At this point, you throw your hands in the air and decide to just buy a new rifle instead. As I mentioned in the introduction, a good archery pro shop will be able to walk you through this process and make getting into archery far less painful. But it is also a good idea to have a little bit of understanding on the subject, even if you decide to go the Pro Shop route. The greatest benefit of going to a Pro Shop is that you’ll often be able to test several different bows to find the one that feels the best for you.
Whatever route you decide to go – pro shop or on your own – here are some of the basics that you’ll want to understand to get started.
DRAW WEIGHT
The draw weight of a bow is the actual amount of force needed to pull it back to full draw. The draw weight is measured in pounds, and can be checked using a simple fish-scale type of weighing device. Most compound bows have a range of 10 pounds or so, which means you can adjust the draw weight of the bow within that range. For example, if you have a bow with a draw weight range of 50-60 lbs., a simple adjustment on each limb will allow you to change the draw weight to any weight between 50 and 60 lbs.
The draw weight is going to be a very critical factor for a couple of reasons. First, if you aren’t able to draw a bow at a certain weight, well, you aren’t going to be able to shoot that bow. You would need something lower in draw weight. Secondly, the draw weight of the bow is going to directly affect the speed of the arrow when it comes off the bow, which is going to directly affect the energy transferred from the bow to the arrow, and then from the arrow to the animal.
Many states have a minimum draw weight that is required for hunting big game animals. Most states that have this regulation are going to require a minimum of 40 lbs., most likely. I personally wouldn’t let my children archery hunt for elk until they were pulling at least 45 lbs., and I tried to encourage them to get to 50 lbs. as quickly as possible once they were comfortable at 45.
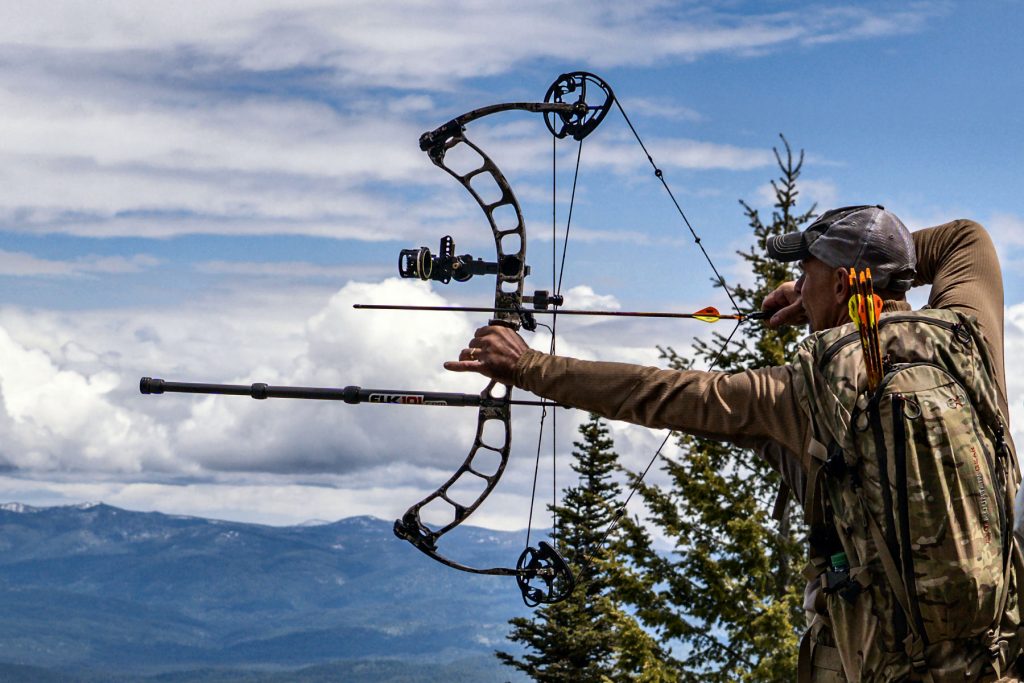
Elk are big, strong animals, and while a well-placed arrow from a 45 lb. bow will work, it doesn’t leave much margin for error.
Just for reference, a bow set at a 68 lb. draw weight, shooting a 475-grain arrow at 280 feet per second, will produce 82.6 ft-lbs of kinetic energy. A lighter setup, for instance, a bow set at 50 lbs. draw weight, shooting a 350-grain arrow at 220 feet per second, will produce 37.6 ft-lbs of kinetic energy. It’s only 18 lbs. less in draw weight, but produces less than half the energy.
I’ll deviate slightly for just a second, as this does relate somewhat to draw weight…but for most archers who are shooting a draw weight of 45-50 lbs., their farthest effective range is going to likely be somewhere around 30-35 yards, and that’s assuming they practice enough to be consistent at that distance. Keep in mind, it’s not “good enough” to be able to hit a pie plate at 20 yards. I always determine my own effective range by the maximum distance that I can consistently stack 5 arrow groups inside a circle the size of a softball (4-5”). Once my arrows no longer group within a 4-5″ group, I have exceeded my effective range, and won’t take a shot at an animal beyond that distance.
I personally shoot my bow set at 67 lbs. draw weight (I order a 60-70 pound bow, and back the weight off slightly). It’s important to keep in mind that when you are selecting your draw weight, you don’t want to end up shooting your bow at the maximum amount of weight you can draw while you are standing on level ground in perfect conditions. In a hunting situation, it’s not uncommon that you will need to be able to draw your bow in a manner that is not consistent with how you draw when you are relaxed and shooting at a level target placed directly in front of you. Kneeling, drawing downhill or uphill, drawing with the bow at an angle to your side, drawing slowly to not be detected, etc., can all make it more difficult to draw a bow. So don’t set your bow’s draw weight at your maximum ability.
DRAW LENGTH
Draw length – It’s important to have your draw length fit you as accurately as possible. Otherwise, you’ll likely end up with some bad habits, especially if your draw length is too long. Additionally, your shooting won’t be as consistent or as precise as it could be.
There are lots of methods for measuring your draw length, but it’s important to understand that the advertised draw length of a bow might not exactly fit your actual measured draw length. The draw length of the bow is most often measured from the nocking point on the string to the front of the hand grip plus 1.75” (or from the nocking point on the string to the front edge of the berger hole on the riser). Keep in mind that a bow that is set at 28” draw, will actually be closer to a 28.5” draw when you add a D-loop to the string. If you measure at 29” and you plan to shoot a D-loop, you’ll want to order a bow at 28.5” draw length (28.5″ + 0.5″ for the D-Loop).
Here are 4 common methods for measuring your actual draw length. I usually measure my draw length using all 4 methods, and have found that they all produce very similar results. Here they are listed by most accurate/common method:
- Wingspan #1 – measure your wingspan (fingertip to fingertip), then minus 15” and divide that number by 2.
- Wingspan #2 – measure your wingspan (fingertip to fingertip), then divide by 2.5.
- Sternum to Wrist – extend your dominant arm straight out, then measure from center of your sternum to your wrist.
- Fist to Mouth – stand straight as if you were drawing a bow. Form a fist with your bow hand (the hand that would hold the bow) and extend your fist to a wall. Make sure your torso is vertical, and that you aren’t leaning to reach the wall with your fist. Then, measure from the wall to the corner of your mouth.
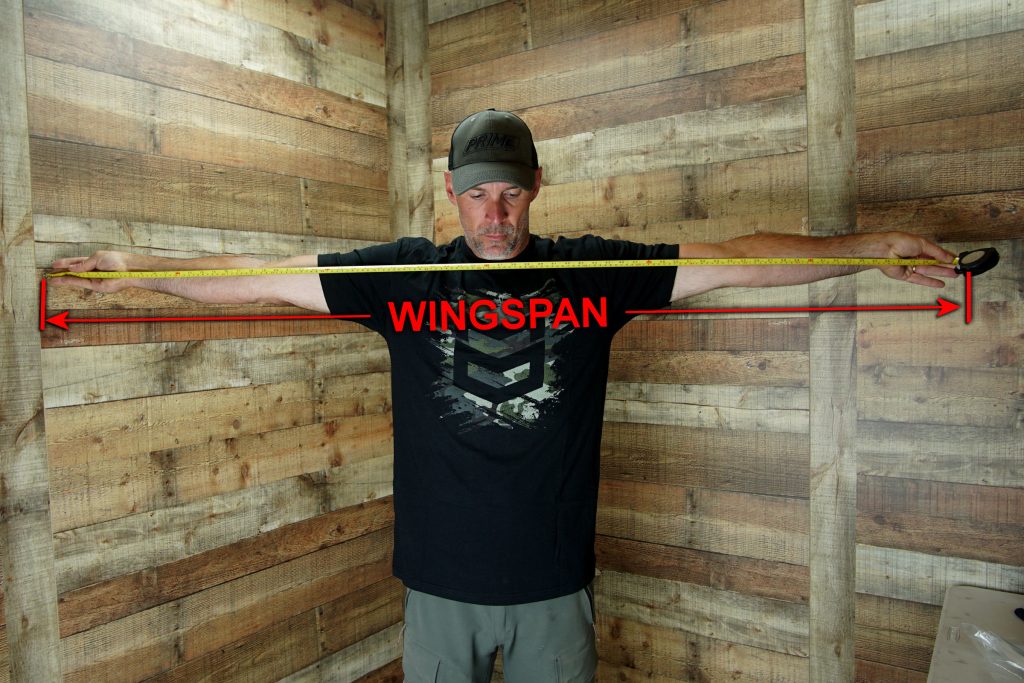
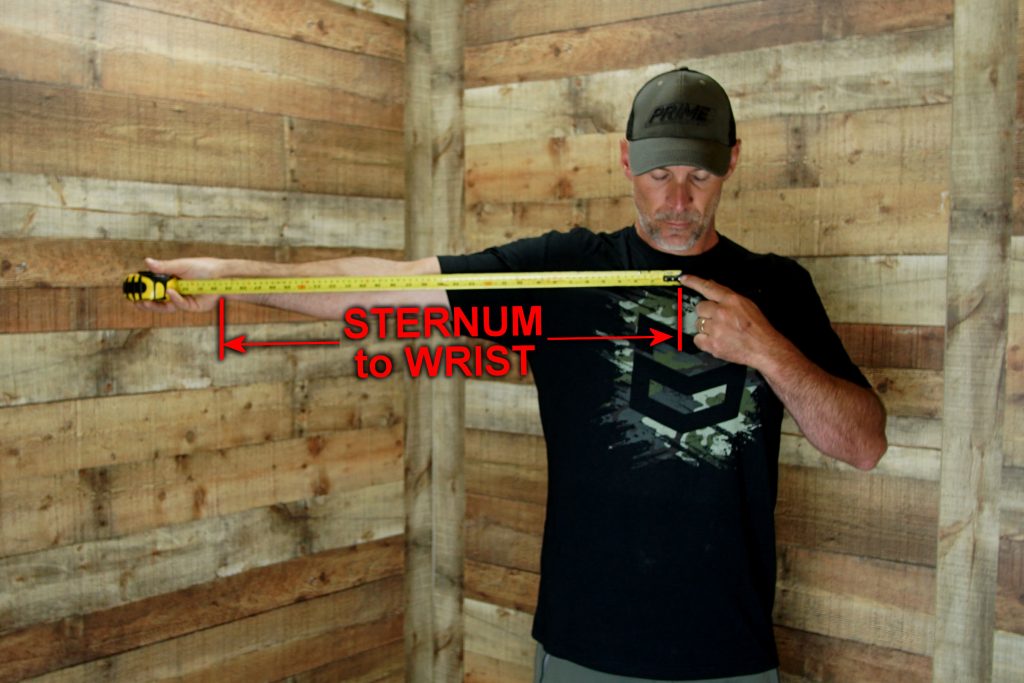
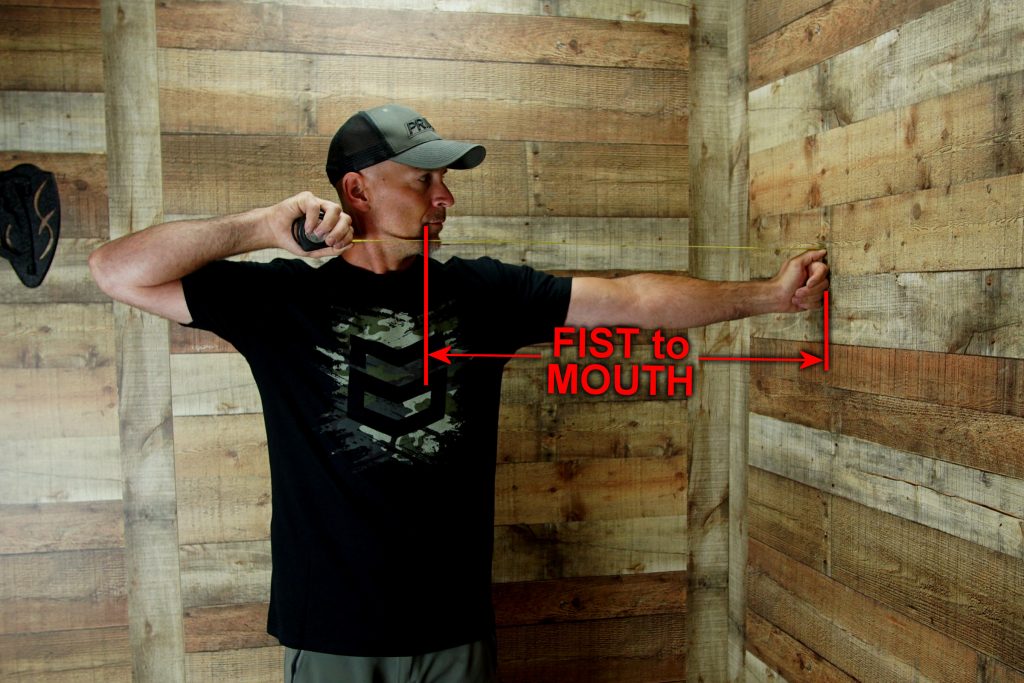
Here are the measurements I get using each method, just for reference:
- Wingspan #1: (72.75 - 15)/2 = 28.8"
- Wingspan #2: (72.75/2.5) = 29"
- Sternum to Wrist: 28.75"
- Fist to Mouth: 28.5"
Based on these measurements, my draw length would average right around 28.75". I'd rather have my draw length be a little short rather than a little long, so I would select a 28.5" draw. Keeping in mind that my D-Loop will account for around 1/2" of my draw, I would need to order a bow with a 28" draw length (28" bow draw length + 0.5" D-Loop = 28.5" measured draw length)...which is what I do.
AXLE-TO-AXLE LENGTH
The A2A (Axle-to-Axle) measurement on a compound bow is the measurement that describes how long your bow is. This is measured from the center-point of the top axle to the center-point of the bottom axle.
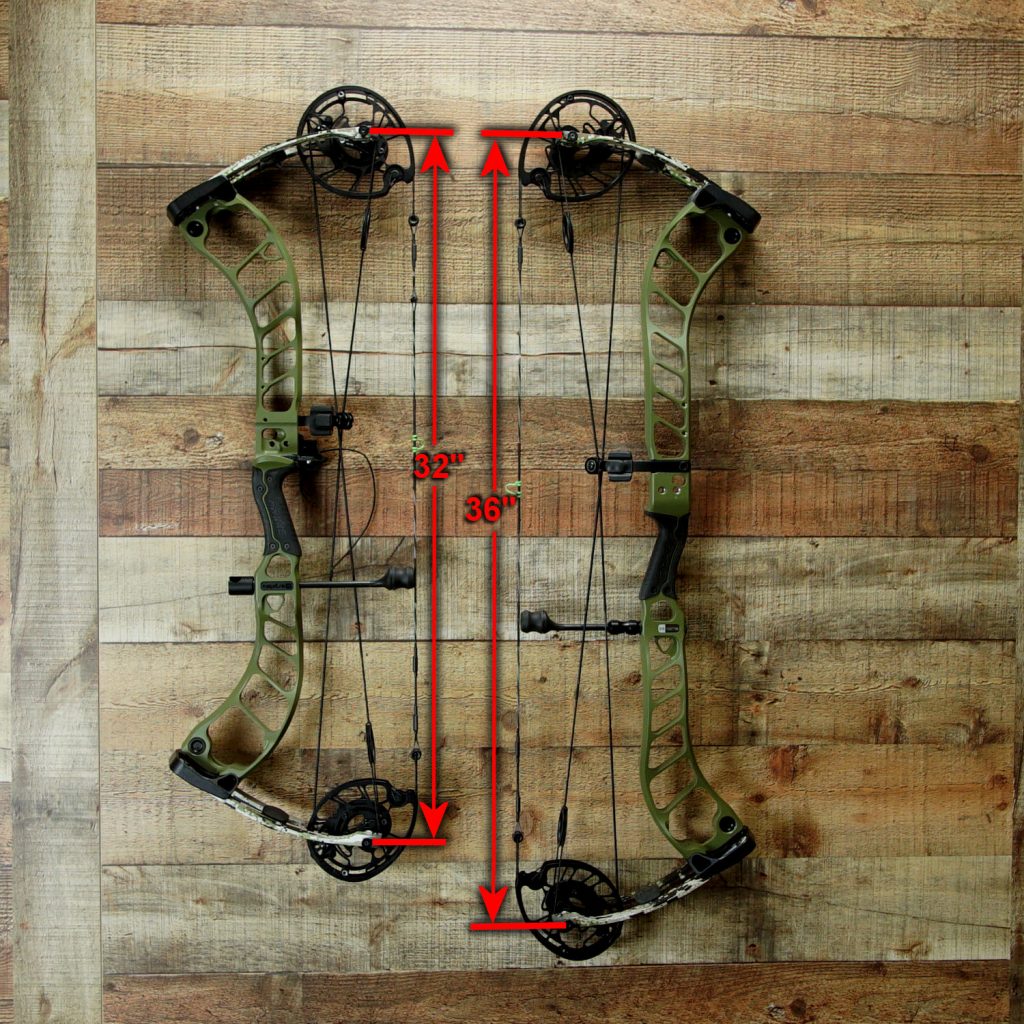
Back in the early-to-mid 1990's, the A2A measurements for most bows were 38-42”. Treestand hunters, a group that makes up a large percentage of archers, weren’t shooting long distances and preferred a shorter A2A bow for easier handling while in a treestand, so shorter A2A bows gained popularity (30-34").
There are two things to keep in mind when discussing shorter A2A bows. First, the angle of the string is going to be steeper when you are at full draw. If you have a longer draw length (over 29”), this steeper string angle could become a problem with nock pinch and the angle of your peep sight. To state it simply: If your string angle is too steep, it could pinch the nock of your arrow and cause your arrow to fall off the string, or it could make the angle of your peep sight steep enough that you might struggle to see through it. Second, a shorter A2A bow will tend to drift more on a target than a longer A2A bow. Vertical stabilization can be more difficult to achieve with a shorter A2A bow. At 20-40 yards, this probably isn’t too noticeable, but as you move back to distances over 40 yards, you’ll notice it’s more difficult to keep your bow “steady” on the target with a shorter A2A bow.
Most bow manufacturers offer bows ranging from 30-38”, and there are some exceptions on both ends of the range. I’ve found that for me, 33-36” is a good A2A measurement, and if I could pick just one, I'd go with 34".
ARE YOU RIGHT OR LEFT-HANDED?
For most archers, it's as simple as knowing which arm is your dominant arm. If you are right-hand dominant, you'll want a right-handed bow (you draw the string back using your right hand). However, there are a few exceptions to this rule...most notably, if your dominant eye doesn't match your dominant hand.
If you are right-handed and right-eye-dominant, you'll shoot a right-handed bow. If you are left-handed and left-eye-dominant, you'll shoot a left-handed bow. But if your dominant eye doesn't correspond with your dominant arm, you'll be best suited shooting a bow that matches your dominant eye. Not sure which eye is your dominant eye? No problem. Here's an easy test:
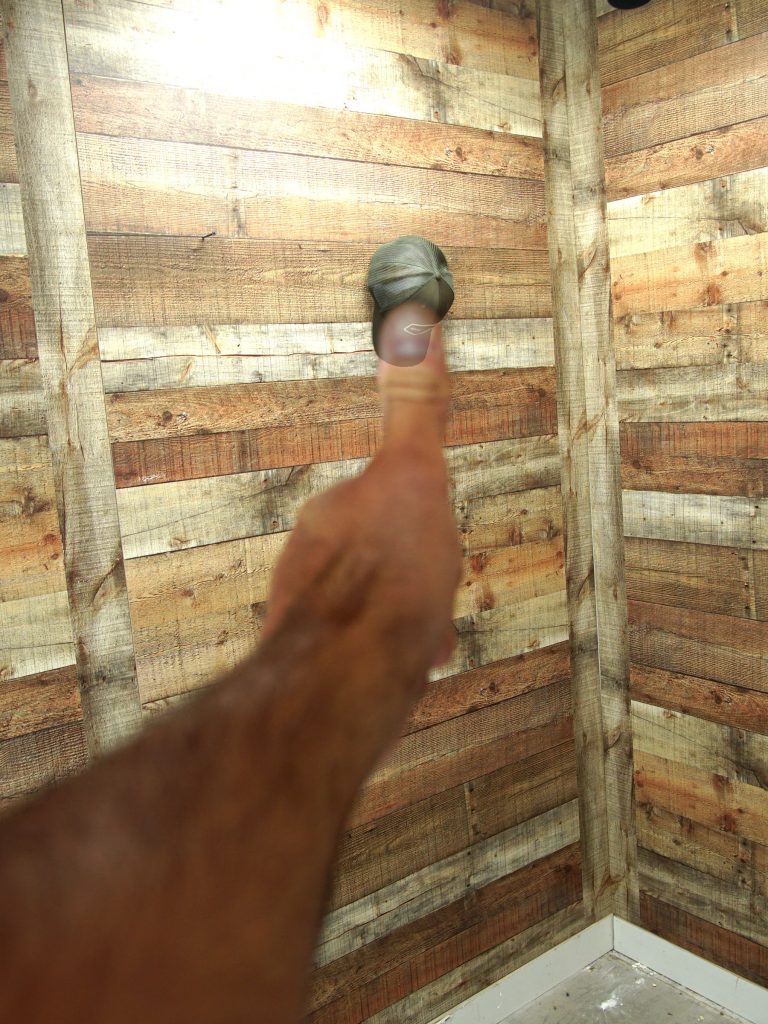
Stand 10 feet or so away from a small object (doorknob, clock on a wall, etc.) with both eyes open. Fully extend your arm out in front of you, and stick your thumb up so that it covers the object in front of you. Focus your vision on the object (with both eyes open), and you should be able to see the blurry outline of your thumb centered on the object (See Image 1 Below). Then, close your left eye. Your right eye will automatically focus on your thumb, and if your thumb is still centered on the object in front of you, you are right eye dominant (See Image 2 Below). However, if your thumb "moves" to the side and you can clearly see your thumb AND the object, you are left eye dominant (See Image 3 Below).
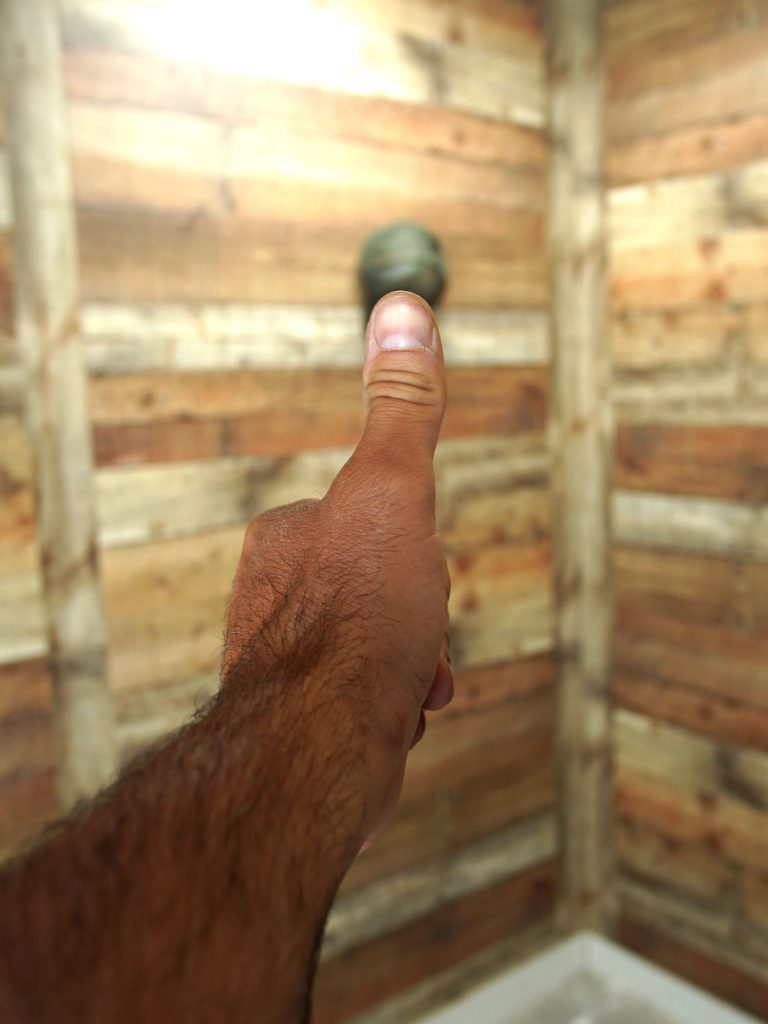
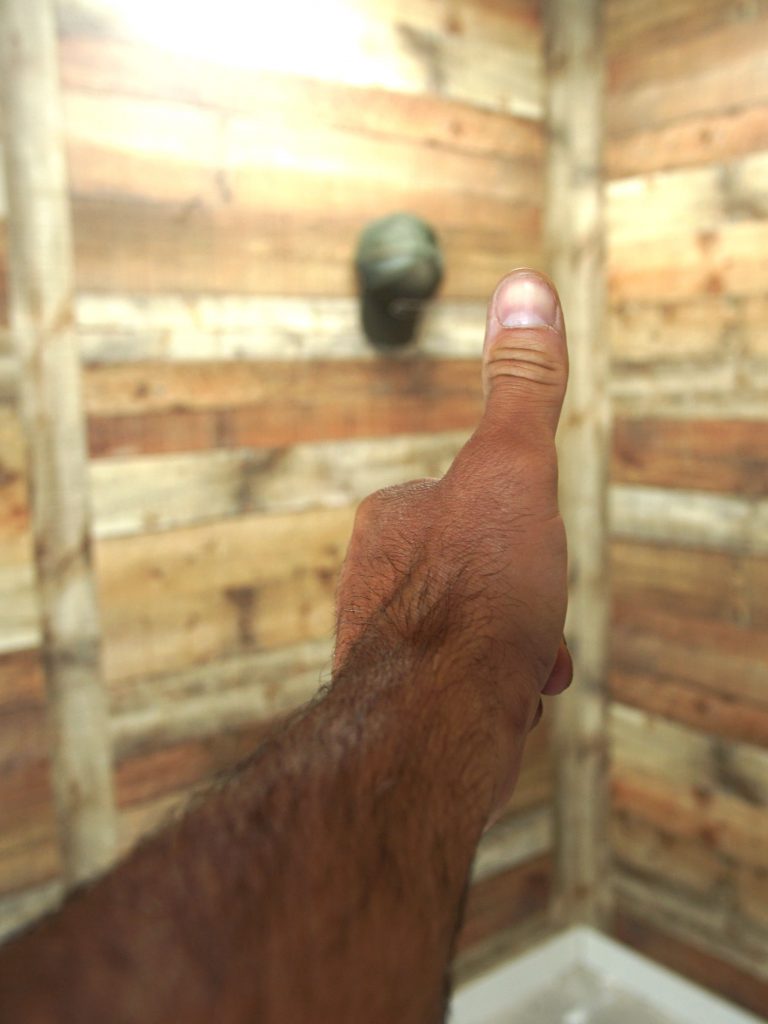
If you believe you are left eye dominant, you can confirm by doing the same test again. Fully extend your arm and stick your thumb up to cover an object 10 feet or so away from you. This time, instead of closing your left eye, close your right eye. If you are truly left eye dominant, your thumb will remain centered on the object when you close your right eye.
Clear as mud?
ORDER YOUR BOW
Now that you know your draw length, draw weight, axle-axle preference, and your eye dominance, you are ready to start looking at options. 🙂
When you go to purchase or order a new bow, you will need to provide the following information:
-Model (often determined by A2A measurement)
-Draw Length
-Draw Weight Range
-Left or Right Handed (whichever is your dominant eye)
-Riser Color or Camo Pattern
-Limb Color or Camo Pattern
See, that wasn't so difficult, was it? And sorry, you're on your own when it comes to selecting the colors... 🙂
Now that you have your bow specifications correct, and you’ve ordered your bow, it’s time to get it set up.
Click ‘Next Chapter’ Below to Continue to Chapter 2: Setting Up Your Bow
