MODULE 18 - ARCHERY BASICS
CHAPTER 3: SIGHTING IN YOUR BOW

SIGHTING IN YOUR BOW
At this point, you have set up your bow in a manner that will allow you to maximize its potential, and hopefully minimize your frustration when you start shooting. Keep in mind that shooting a bow takes hours and hours of practice to be able to build the muscles – and the muscle memory – to comfortably draw, hold, and shoot with accuracy. With that in mind, it’s time to get sighted in. But keep in mind that you will likely need to tweak your sight/pins as you gain muscle memory and become more and more accurate.
MULTI-PIN VS. SINGLE-PIN SIGHTS
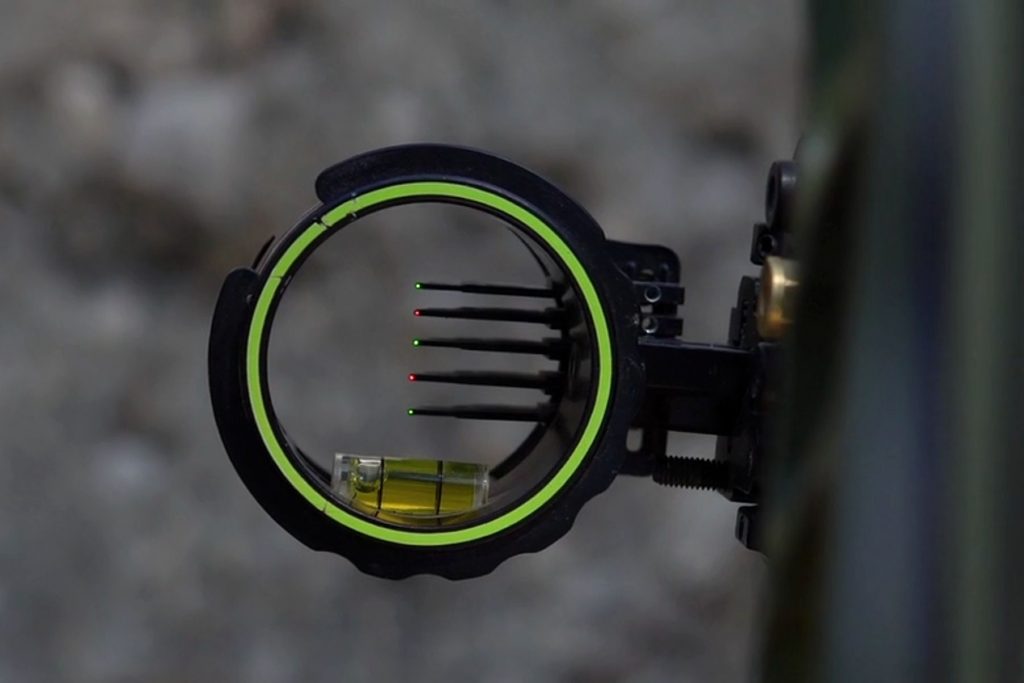
When it comes to elk hunting, I’ve found that I am far more comfortable shooting a multi-pin sight versus shooting a single-pin sight. A multi-pin sight has 3-7 pins that are “fixed” within the sight housing and each pin represents a different distance. For example, if you have a 5-pin sight, your pins might represent 20, 30, 40, 50, and 60 yards (from top to bottom). If a target is at 30 yards, you would look through your peep sight, center your sight housing in the peep sight, and then place your 30 yard pin (2nd pin) on the spot you want to hit. As you move back in distance, you would need to raise your bow higher to be able to hit that same spot, which is accomplished by using a lower pin to aim with.

With a single-pin sight, you have just 1 pin, and instead of using a lower pin to shoot a farther distance as you would with a multi-pin sight, you need to adjust your entire sight housing lower to manually move the single pin to compensate for the added distance. While having just one single pin in your sight window allows you to see more of your target, it isn’t always ideal – or even practical – when it comes to hunting elk.
If an elk is standing broadside at 45 yards, you could adjust your single-pin sight precisely to 45 yards (a task that requires the use of both of your hands). Once you’ve made the adjustment, you can draw your bow and your sight is set on 45 yards.
But if the elk turns and starts walking toward you, and your next shot opportunity comes at 22 yards, you don’t want to use the pin that is now set on 45 yards. The only way to adjust the sight is to let down, use both hands to adjust the sight housing, and then redraw, aim, and shoot. The likelihood of that happening is, well, we’ll just say it’s zero.
With a multi-pin sight in the same scenario as above, you would draw back and “gap” your 40 and 50 yard pins equally above and below your aiming point when the elk is at 45 yards (using an imaginary 45 yard pin that is centered equally between your 40 and 50 yard pins). As the elk moves in to 22 yards, you simply lower your bow slightly until your 20 yard pin is on the aiming spot, and shoot. There is no letting down required, no physical adjusting of the sight necessary. A single-pin sight will work nicely in a perfect situation where you are able to range, set your sight, draw, aim, and shoot – without the elk moving toward or away from you. But a multi-pin sight gives you the most versatility when it comes to hunting a dynamic animal like an elk in a real-world hunting situation.
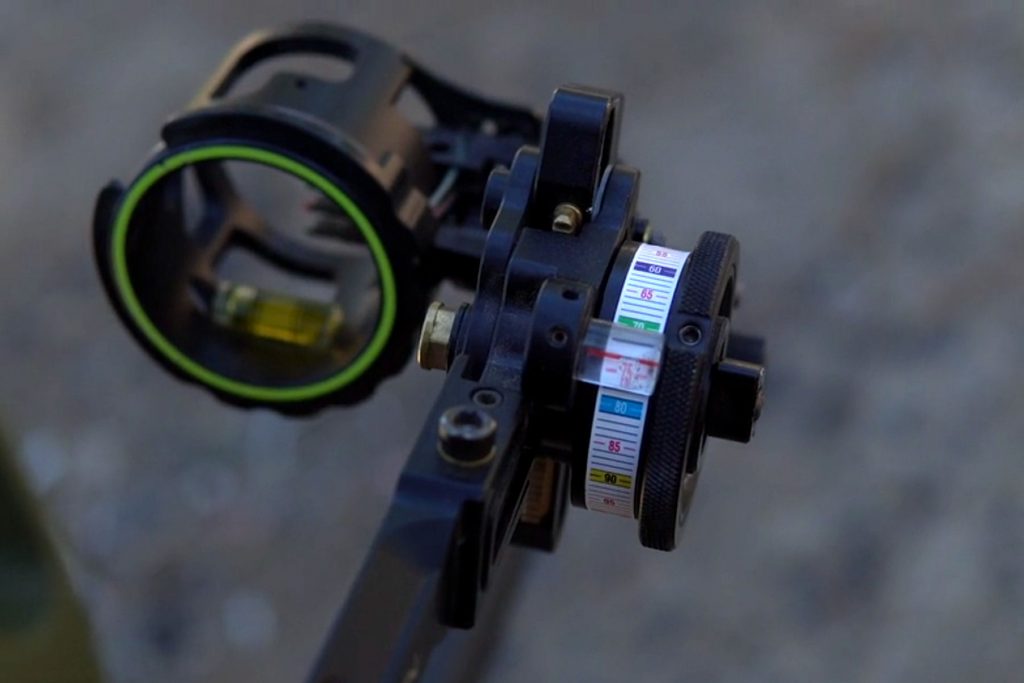
Single pin sights are considered sliding sights (or sliders), as you are required to manually slide the sight housing up or down to adjust for different distances. Multi-pin sight are normally considered “fixed” sights because the sight housing and associated pins are fixed and immoveable. However, multi-pin sights can also come with a sliding option. A multi-pin slider sight is just like a multi-pin fixed sight (3-7 pins within the sight housing), but it also has the option of sliding to accommodate for even farther shots. You simple set your pins just like described above (if you have 5 pins, you might choose to sight the pins in to represent 20, 30, 40, 50 and 60 yards). Then, you designate one of your pins as your “slider” – I prefer the bottom pin. When your sight housing is “zeroed”, your 5 pins accurately represent 20, 30, 40, 50 and 60 yards. But you can also reach up and manually dial your sight housing so that it moves up or down, allowing you to use your slider pin for alternate distances as well.

I personally shoot a multi-pin “slider” sight, which incorporates the best of both worlds – multiple pins in the sight housing (my preference is 5) and a sight housing that can be adjusted to use my bottom “slider” pin to shoot farther distances. When hunting, I never use my slider for my first shot, meaning if I have 20, 30, 40, 50 and 60 yard fixed pins, my first shot is not going to be over that distance. But, if I shoot an elk and it then runs out to 80 yards and stops, I can quickly and easily adjust the sight housing so my slider pin is now representing 80 yards, and take an accurate follow-up shot.
This is probably WAY too much information for a beginner guide to sighting in a bow, but hopefully after you watch the following videos, it will answer more questions than it produced. 🙂
Here is the video on how to sight in a bow using a fixed-pin (multi-pin) sight:
And here is the video for sighting in a bow with a slider sight:
Now the set-up work is done, and all that's left is to shoot your bow...over and over and over. Shooting for several months ahead of archery season will allow you to prove your equipment, become comfortable and confident in your equipment, perfect your form and lock in your muscle memory, fine-tune your pins so you are able to consistently hit the spot you are aiming at, and determine your effective shooting range - all important aspects for successfully bowhunting for elk.
Click ‘Next Module’ Below to Continue to the Conclusion page


