
MODULE 13 - FIELD CARE OF ELK MEAT
CHAPTER 1: AN OVERVIEW OF FIELD CARE OF ELK MEAT

The main principle behind the subject of Field Care of Elk Meat is to get the meat off the animal and into a protected environment where it can cool properly. This process ensures the meat stays clean and doesn’t go bad. With the typical warm conditions that can exist in the fall – especially during September and October – it is often critical to work quickly to make sure the meat doesn’t sour or rot.
FIELD PHOTOGRAPHY
Having quality photos will help preserve the memories of the hunt and tell a compelling story of your adventure. Snapping a couple pictures with the arrow sticking out of the elk and the bloody tongue hanging out of the mouth as you sit on its back leaves a bit to be desired. It is worth taking a few minutes to properly respect the animal and set it up so you can document your success. However, the clock is ticking and you need to get the hide off the elk quickly to begin the cooling process of the elk meat. Most times, you can’t afford to waste time. Here are a few ideas to help you efficiently take quality field photos of your elk so you can get started on the real work.
Make the animal and are area around it presentable. I carry a small ziplock bag with 8-10 baby wipes in it to wipe blood off the face of the elk and around the wound. Less blood puts more focus on the animal and delivers a better photo. I also take a few seconds to cut the tongue off. A tongue hanging out the side of the elk’s mouth is not attractive for a picture. Two or three minutes spent on these simple tasks will go a long way in improving the quality of the photos you take.
Clear any brush or grass that is lying between the camera and the elk. You want the focus of the photo to be the elk. Brush and grass in front of the elk can affect the focus of the camera and become a distraction to the photo. Again, a minute or two spent preparing the area will drastically improve the overall quality of your field photos.
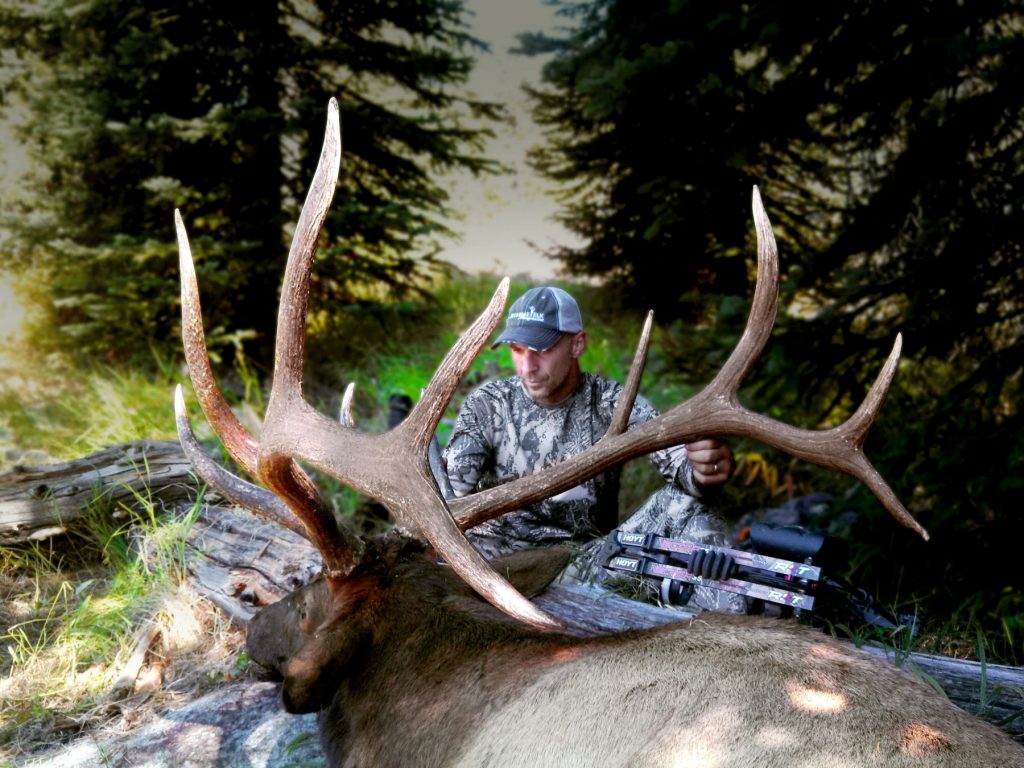
The last thing to consider as you are preparing for field photos is the position of the animal and the hunter. Elk are big animals, and moving them around is not easy. If you are able to take the pictures from an elevation that is equal to or slightly above the elk, that provides the best angle. Sometimes, just sliding the back legs of the elk a few feet can achieve a completely different angle and background for your photos.
Take a few practice photos to make sure you are getting the angle and perspective you want. Then, add the hunter (you) to the photo. A self-timer or hunting partner can take the photo while you pose with your success. It is usually best to kneel naturally behind the animal rather than stand beside it or kneel in front of it. Definitely don’t sit on it… J Be sure to position your weapon so it can be seen in the photo, but don’t make it the focus of the photo (i.e., don’t set it on top of the animal or in the antlers), and make sure if it is a rifle that it isn’t pointed at you or anyone else in the photo.
All in all, you should be able to clean up the area and get several quality photos in 10-15 minutes. This isn’t going to affect the outcome of your field care of the meat, and will provide memories from the hunt that will last forever.
KNOW BEFORE YOU GO
With pictures out of the way, it’s time to get serious. The key to what you’re doing at this point is getting the meat off the carcass so it can cool quickly, and getting it into game bags to protect it from dirt, debris, and bugs. Efficiency is better than speed here as you will be working with razor sharp knives. Be careful and cautious to ensure you or your hunting partners don’t get cut. Whether you’ve field dressed an elk a few times or never at all, a refresher of this process just before the hunt can be very valuable.
In addition to a knowledge of how to get the meat processed efficiently in the field, it is important to understand the game laws for the state you are hunting. This knowledge before you go hunting will help ensure that you don’t end up with a citation for skipping a step in the process. Here are a few oft-overlooked meat processing regulations that you will want to understand for the state you are hunting before you go.
TAGGING THE ELK
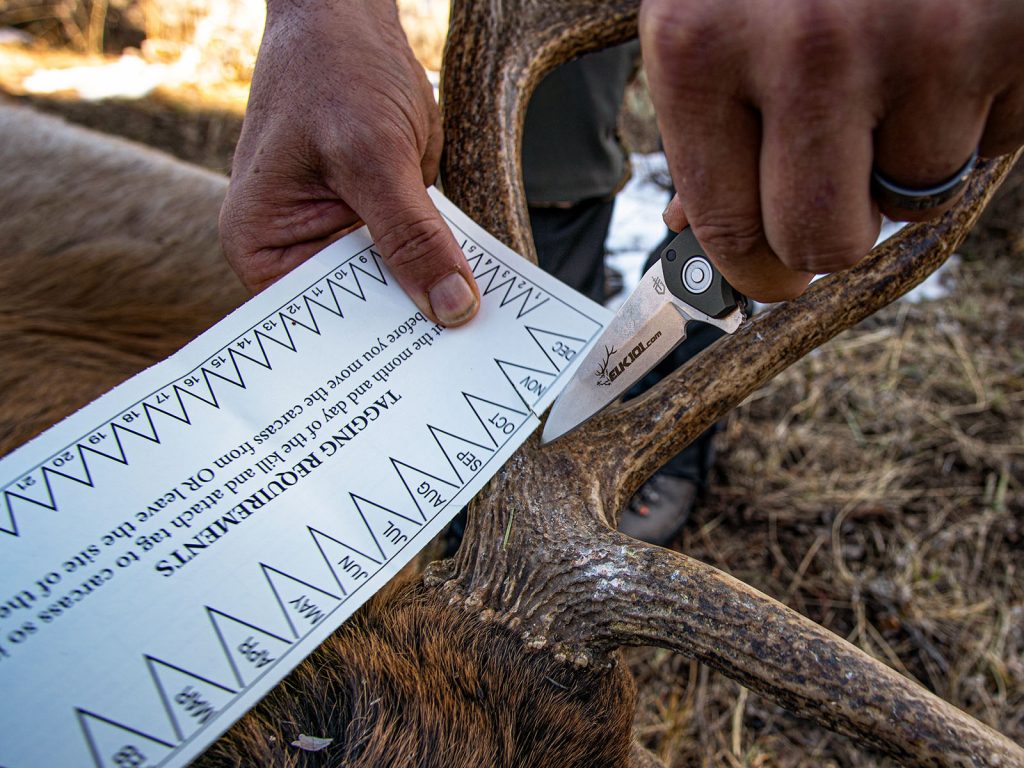
Each state varies in what they require during field processing, so be sure you clearly understand what is required. One of the primary regulations you will want to know as soon as you recover your elk is how to properly tag it. Some states allow you to affix the tag to the antlers, while others require it be attached to the meat. This will be one of the first things you do once you find your elk, so know what is required before you head into the field. Failure to properly tag your elk is a common violation and one of the first things game wardens look for in the field.
WANTON WASTE
Most states also have laws associated with how much meat you need to remove from the animal. Hopefully, you are going above and beyond the minimum requirements anyway, but make sure you don’t leave something you are required to remove.
Some states are so specific that they will actually list all of the parts that are to be removed (quarters, backstraps, neck meat, rib meat, etc.). Other states require that you simply remove all accessible portions of edible meat. Again, there is no need to leave any of this delicious, healthy, and organic meat to rot in the field. Get it all.
EVIDENCE OF SEX
Many states also require elk hunters to bring out evidence of the animal’s sex with their meat. This is usually accomplished by leaving the reproductive organs (or a portion of the organs) attached to one of the hind quarters. CHECK OUT THE INSTRUCTIONAL VIDEO FOR LEAVING EVIDENCE/PROOF OF SEX IN THE NEXT CHAPTER.
Another common regulation in some states dictates how the antlers can be removed and transported. Again, each state varies in their requirements, so it is important to know these regulations before you head into the field. A few minutes of studying the rules ahead of time can prevent a citation or the possible loss of your elk.
With continually changing laws, it isn’t possible to provide a chart that lists all of the laws for each state when it comes to field care. Instead, be sure you reference the actual regulations for the state you will be hunting, for the year you will be hunting there.
TOOLS OF THE TRADE
I try to keep my pack light and efficient, so there are probably a few things missing from my Kill Kit that others might deem necessary. You will notice I don’t carry a bone saw of any kind. I have found it isn’t necessary for processing an elk, so I don’t bring one with me. The gear that I do carry to process an elk in the field is light and it gets the job done completely and efficiently. Here is what I carry in my Kill Kit:
Baby wipes
I carry a small Ziploc bag with 8-10 wet wipes for cleaning up the animal for pictures, as well as for cleaning up my hands when I’m done processing the elk.
License/Tag
My license and tag are kept securely in my Kill Kit. I usually won’t need it readily available until I shoot something, and this ensures it doesn’t fall out of my pack while I’m digging around for trail mix or batteries. Some states require you to sign your tag upon success, so I also carry a pen in my Kill Kit.
Flashlight
In addition to the primary flashlight I carry in my backpack, I carry a small, backup light in my Kill Kit, just in case. I’ve packed many elk out of the backcountry in the dark, and I want to ensure I have light if I get stuck quartering or packing an elk late into the night.
Extra batteries
My camera and flashlight become wasted weight in my pack if they don’t have batteries. I want to make sure I am able to get pictures, and I want to make sure I have light for processing or packing in the dark.
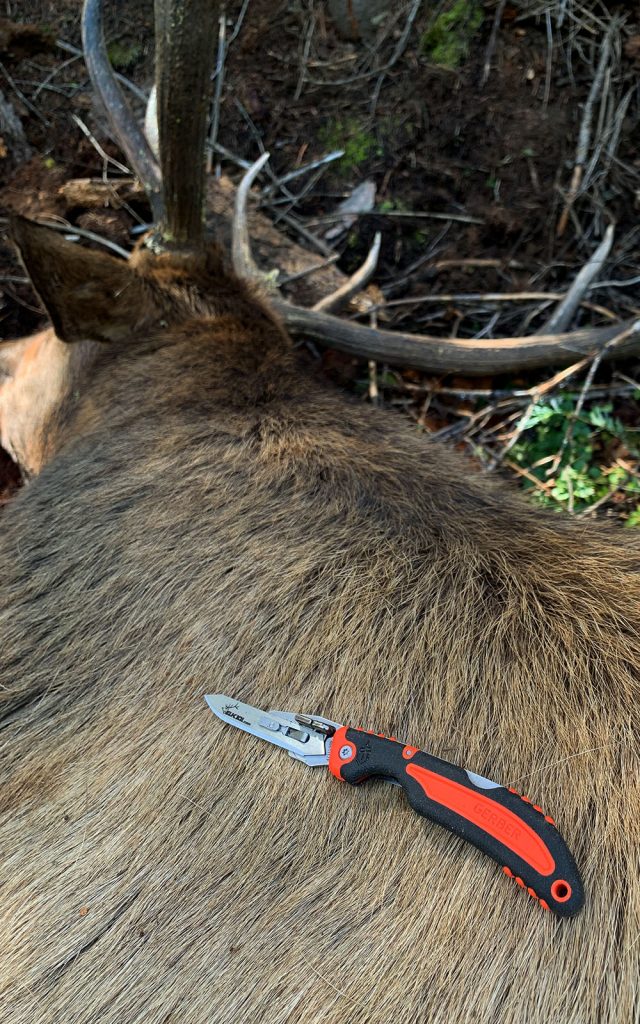
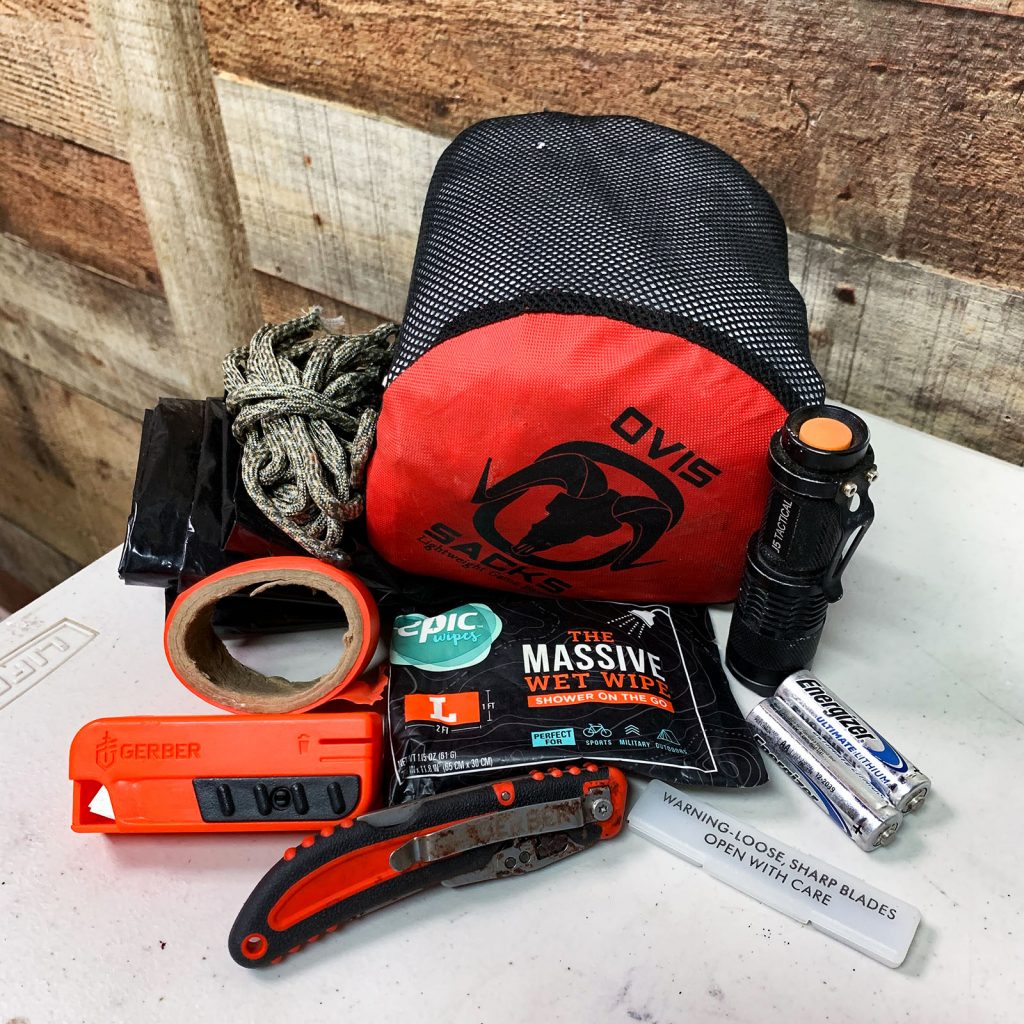
Depending on what kind of knife you use, you will need your knife plus replacement blades or a knife sharpener. Making it through an entire elk without replacing or sharpening the blades is rare. Personally, I prefer to carry a lightweight knife with replaceable blades. Some hunters have concerns about being able to “pry” with these thin blades, but once you learn to use them properly, you’ll find there is no reason to be prying to begin with. Again, I can’t stress enough the importance of being cautious as you process the elk.
Flagging Ribbon
I keep a small roll of flagging ribbon in my Kill Kit and use it for flagging the bloodtrail as I track. I have also used it to flag the trail in and out from the kill site if I need to make a return trip. A GPS-device can also be used in place of flagging ribbon for the return trip into the kill site.
Parachute Cord
I carry a small roll of parachute cord (50-100 feet) and use it to build a makeshift meatpole and to hang the quarters on the meat pole. It can also come in handy for tying elk legs to nearby trees, etc., if you are processing the elk alone and don’t have a hunting partner there to assist you.
You need something to put the elk meat into once you remove it from the carcass. Without game bags, you run the risk of getting the meat covered in dirt and debris. Game bags also keep pesky flies and bees off the meat. As a general rule of thumb, I always carry five game bags. I use two for the hind quarters (one each). I fill two more bags with the following pieces in each: a front quarter, a backstrap, a tenderloin, and half the neck/rib meat into one bag. Lastly, I carry a fifth bag to keep the cape in if I am bringing the cape out. If I’m not planning on getting the elk mounted, I can use the fifth game bag to put over the skull if I’m bringing the skull out for a European mount.
There are several options when it comes to game bags, both in terms of quality and size. As you consider what game bags to get, you want to make sure they will do the job. And that job is keeping the meat clean, keeping flies off the meat, and getting the meat cooled as quickly as possible.
I have heard of people using pillow cases for game bags, and the basic concept will work. However, most pillow cases are made of cotton and they lack sufficient closures to keep bugs out, so I would caution against using them. Cotton absorbs and stores moisture, and moisture is an enemy to meat. For this reason, I prefer to use synthetic game bags. Synthetic materials will wick the moisture away from the meat, and are definitely preferred over cotton when it comes to game bag construction. Synthetic game bags are also very lightweight and small, so they don’t take up a lot of room in your pack or weigh you down.
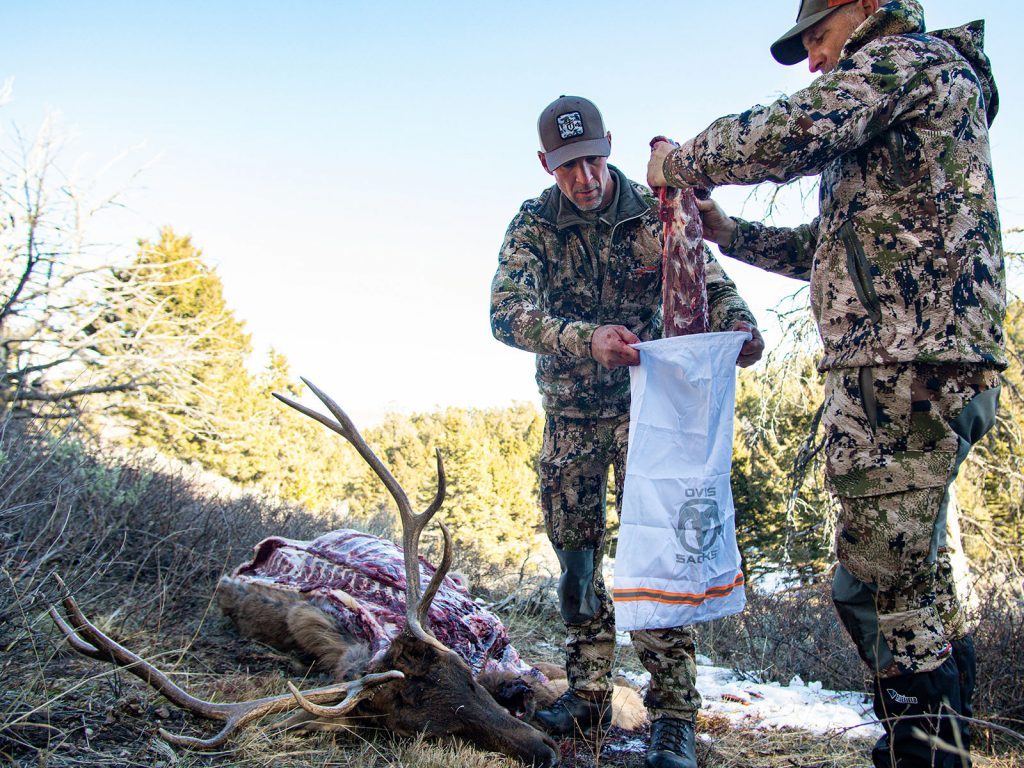
For the most part, if a game bag states that it is made for Big Game, or more specifically, for elk, they should be the correct size. I have had a few instances where the hind quarters of big-bodied, mountain bull elk didn’t quite fit into a game bag, but that has been very rare. At that point, the only option is to take the meat off the bone so it will fit.
For the most part, if you are planning to leave the meat on the bone, four 24” x 40” game bags will generally work great. It you are taking the meat off the bone (boned out), four bags in the 18” x 24” range will be sufficient. These are approximate sizes, and a bag that is equivalent will likely work just as well. Again, I like to carry an extra bag for the cape/skull. Plus, it is better to have an extra bag than to end up short by one bag. Most synthetic game bags in these size ranges should come in pretty close to one pound for four bags and fold up neatly in your Kill Kit.
Armed with a basic understanding of the task that lies ahead, and the tools needed to accomplish the job, we are ready to jump in and take a detailed look at the process involved with processing an elk in the field.
Click ‘Next Chapter’ Below to Continue to Chapter 2: Processing An Elk: In the Field Instruction


