
MODULE 14 - PACKING YOUR ELK
CHAPTER 2: IT'S ALL ON YOUR SHOULDERS

If the only option you have for hauling the elk from the backcountry to your camp is on your back, this process can become an adventure of its own. I have carried quarters over my shoulder without a pack, I have secured heavy loads onto tiny, little day packs, and I have burdened myself – and my hunting partners – with more weight than I have been prepared to carry. And those were the good experiences!
If you are going to carry the elk on your back, there are a few lessons and tactics that can make the experience less painful.
WHAT KIND OF PACK?
I talked a bit about backpacks in the Elk Hunting Gear Module. When you are selecting a backpack for hunting – especially if you are planning to use that pack to haul elk meat – consideration should definitely be given to how that pack is going to perform under really heavy loads. The following three pack styles can have an impact on your hunting style, and on your packout: Day Packs, Bivy Packs, and Freighter Packs.
DAY PACKS
Lightweight Day Packs are designed to help you carry minimal loads comfortably. Day Packs can be quite advantageous when covering several miles of rugged elk country each day, and enable a hunter to be fast and light on the mountain. However, their comfort is often rapidly diminished as the weight of the load increases.
Standard Day Packs are typically not designed to carry more than 20-30 pounds, so a front shoulder is going to exceed their capacity for comfort. It can be done, and I’ve done it myself on a few occasions, but it isn’t very comfortable. If I am hunting with a Standard Day Pack, it is usually because I am planning on staying relatively close to the truck, and I will always have a bigger pack ready to go when I return with my first light load of elk meat.
BIVY PACKS
Whether you are carrying your full camp around on your back or not, bivy packs generally provide you with more capacity, both in terms of volume and the weight you can carry.
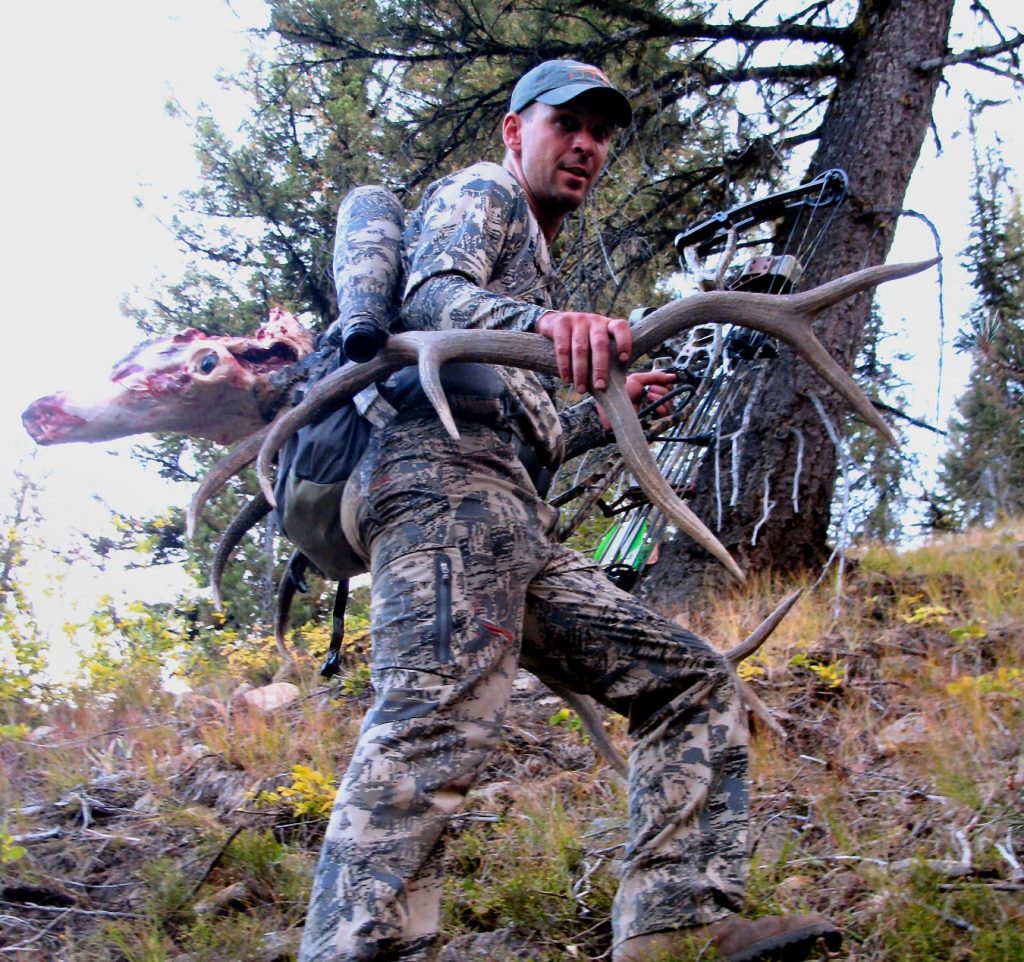
Most bivy packs are designed around a rigid internal frame that allows the pack to keep a trim, lower profile, yet have an increased load-hauling capacity. However, many bivy packs are designed for carrying a backcountry camp, and not for carrying punishing loads of elk meat.
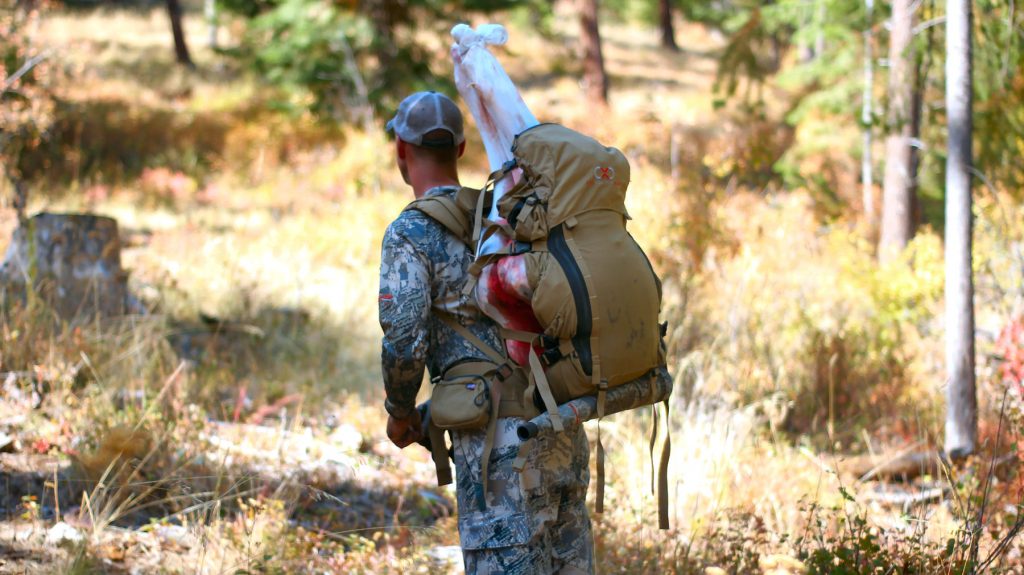
I have used bivy packs that carried a typical camping load of 35-45 pounds quite comfortably, but when a hind quarter of an elk was placed on the pack, they failed miserably. The only way to really know for sure, is to load the pack with a typical “elk quarter” load and test it in the field.
The right bivy pack can be a life-saver, especially if you can find one that bridges the gap and allows you to “day hunt” comfortably AND carry heavy loads of elk meat out on your first trip.
FREIGHTER PACKS
External-framed freighter packs were originally designed for one specific purpose – hauling heavy loads.
The nature of their design – basically an aluminum frame with a shelf – makes them less than ideal for hunting in though.
The frame is often designed with a wider profile to stabilize heavier loads, which makes it more difficult to navigate thick brush and heavy timber. Additionally, with the exposed frame, noise quickly becomes a concern. However, I always have a freighter pack in my truck or back at camp, and if I have to go back in for a return trip to pack out an elk, I grab the freighter. I am generally able to carry significantly more weight more comfortably with these packs.
PROPER PACK FIT
Regardless of what style of pack you use, adjusting it to get a proper fit is critical in increasing its comfort and capabilities.
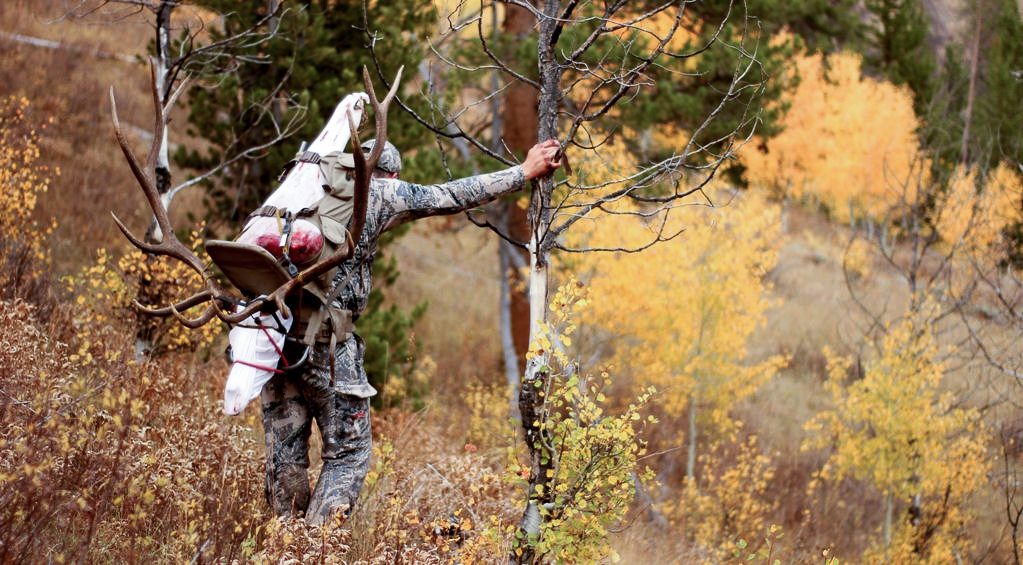
Again, carrying minimal loads can be accomplished comfortably in many different packs. However, it’s important to test the maximum carrying capacity of the pack you choose to make sure you are going to be able to get your elk packed out with the least amount of discomfort possible. And a properly fit pack is a comfortable pack.
The main job of the pack is to keep the load secure and transfer/distribute the weight of the load off your shoulders and down to your hips. This allows your legs to do the majority of the work and keeps the excessive pressure off your back. If the load is resting on your shoulders, the weight is transferred through your shoulders, across your upper back, into your lower back, and then to your legs. Your shoulders and back will not be happy with you.
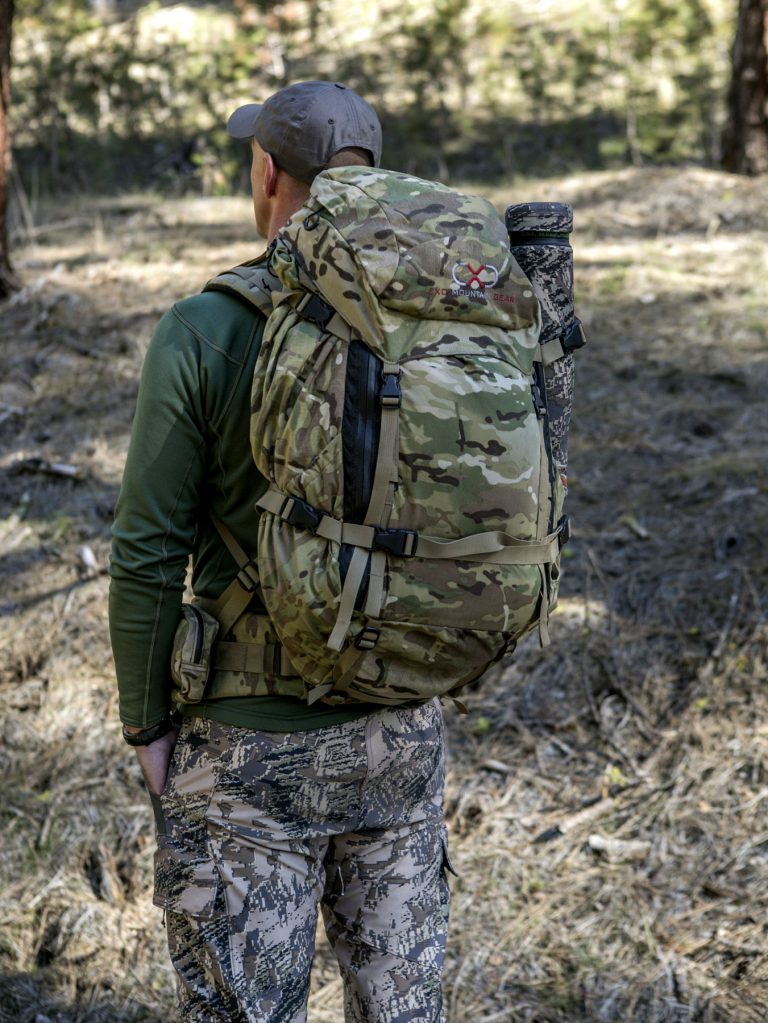
For heavy loads, proper pack fit becomes crucial, and the following areas of the pack become increasingly important: torso length, waist belt, and shoulder straps/load lifters.
Torso length is the distance along your spine between the 7th cervical vertebra (the knobby bone at the base of your neck) and the level of the hip iliac crest (at the top of the hipbones). This determines the size of the pack, or the level of adjustment if the pack has torso adjustments.
When a proper torso length is achieved, the waist belt should ride so that it is centered over the iliac crest (at the top of the hipbones). The shoulder straps should contour smoothly over the shoulder and remain in contact with the body throughout the entire length of the padding without any gaps. Depending on the manufacturer, shoulder straps can often be swapped out for a better fit, if necessary.
Waist belts should ride centered over the hipbones, and need to be snug. This is the part of the pack that will be carrying the bulk of the load. When fully tightened, the padding should fully wrap past the crest of the hips by several inches. Like the shoulder straps, if the stock waist belt doesn’t fit, a different size might be needed.
Load lifter straps are designed to take pressure off the shoulder straps (front of the shoulders) and transfer the load vertically down to the hips. A 30 to 60 degree angle of the strap is a general guideline to achieve shoulder strap lift. Be aware that some packs on the market don’t have true lifting straps, but more of a load stabilizing strap. These function by compressing the load closer to the back, stabilizing it, but not providing enough angle for effective lift.
However, as long as the load lifter strap is able to efficiently transfer the weight/tension off the top of the shoulder straps out to the front of the shoulder straps, this will enable the load to be carried more by your hips and legs and less by your shoulders and back.
To make sure you are setting up your pack for optimal fit, it is important to load the pack with 30 or more pounds of evenly distributed weight. This will allow you to fine tune the fit as the weight pulls everything tight.
PROPER BALANCING OF LOADS
Getting your pack fitted correctly is simply the first step in achieving a comfortable pack. It is possible to negate the perfect fit of a pack simply by loading it incorrectly.
Your body is designed to haul a load that is vertical and placed equally around the skeletal/muscular system. As you add weight to one side of your body (i.e., your back), this causes an imbalance and forces your musculoskeletal system (muscles, bones, tendons, etc.) to adjust. The further the weight is located from your body’s center of mass, the more strain it puts on your body. And that strain is what makes you uncomfortable, tired, and sore.
In order to load a pack that is stable and controlled while in use, a basic premise should be kept in mind. The pack’s center of gravity exerts leverage away from your body. The amount of leverage increases with the increasing distance between the pack’s center of gravity and your body’s center of gravity (your spine). A load closer to the spine means more weight sits down on your hips, while one further from the spine means more weight pulls out on your shoulders.
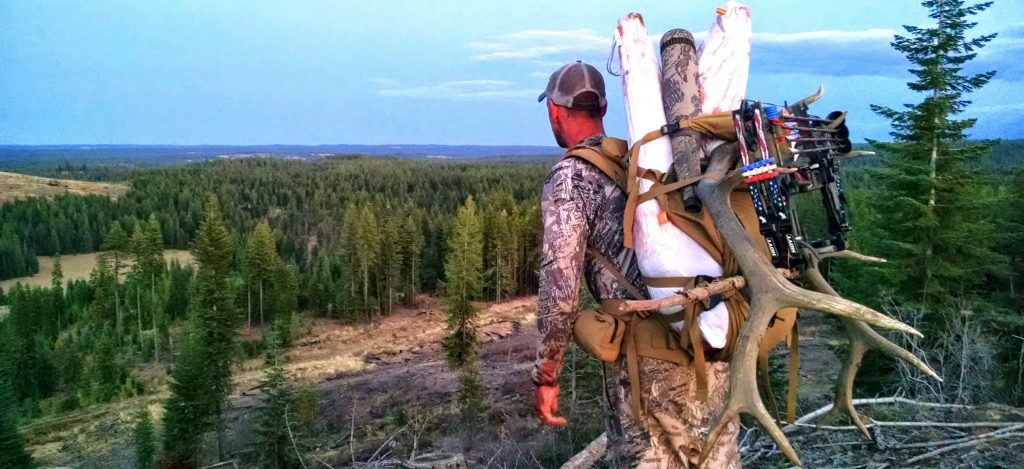
In order to keep the pack’s leverage small, it must be loaded vertically with the heaviest items closest to the spine. A poorly loaded pack tends to pull backwards. This causes instability, uncontrolled rotation, and ultimately fatigue and possible injury. In the backcountry, every step needs to be controlled, and an improperly loaded pack makes it harder to do so.
When loading gear into a pack, keep in mind the weight of each item, as well as its usage. Lightweight sleeping bags and sleeping pads that aren’t needed throughout the day can be stored in the bottom of the pack with other light items (clothing). On top of that, you can load your heavier, more dense items like food, water, tent, fuel, etc. The periphery of the pack can then be stuffed with freeze-dried food and other lightweight items. This keeps the heaviest items closest to your spine, and places the lighter items farther away to reduce the amount of leverage the pack puts on your back and shoulders.
For frequently used items such as headlamps, GPS, snack food, and calls, you can stash them within easy reach by using side or top pockets. This allows for minimal searching of the pack in time of need. Strapping light gear on the outside of the pack is an option if the interior lacks room. Personally, the only thing I strap to the outside of my pack is my bugle tube and a decoy. This allows for quick, easy access of the items I use most frequently. Sometimes, when I have a load of meat and camp together, I’ll also strap my bow to the outside of the pack in order to free my hands to be able to use trekking poles.
As you load your pack, you always want the heaviest items situated so they are closest to your back. When you are packing an elk out, don’t carry your extra jacket and sleeping bag inside the pack, and strap a hind quarter to the outside of the pack. Always put the heaviest items as close to your back as possible.
In addition to keeping heavy items snug against your back, you will want to keep the center of the load centered on your back vertically. If you place the weight so that it is sitting too high, you will feel top heavy and your body’s core will be required to continually balance the load. If the load is centered too low, it can be difficult to get your waist belt to sit properly, which puts more strain on your shoulders.
Below you will find a couple diagrams showing the proper way to load your pack:
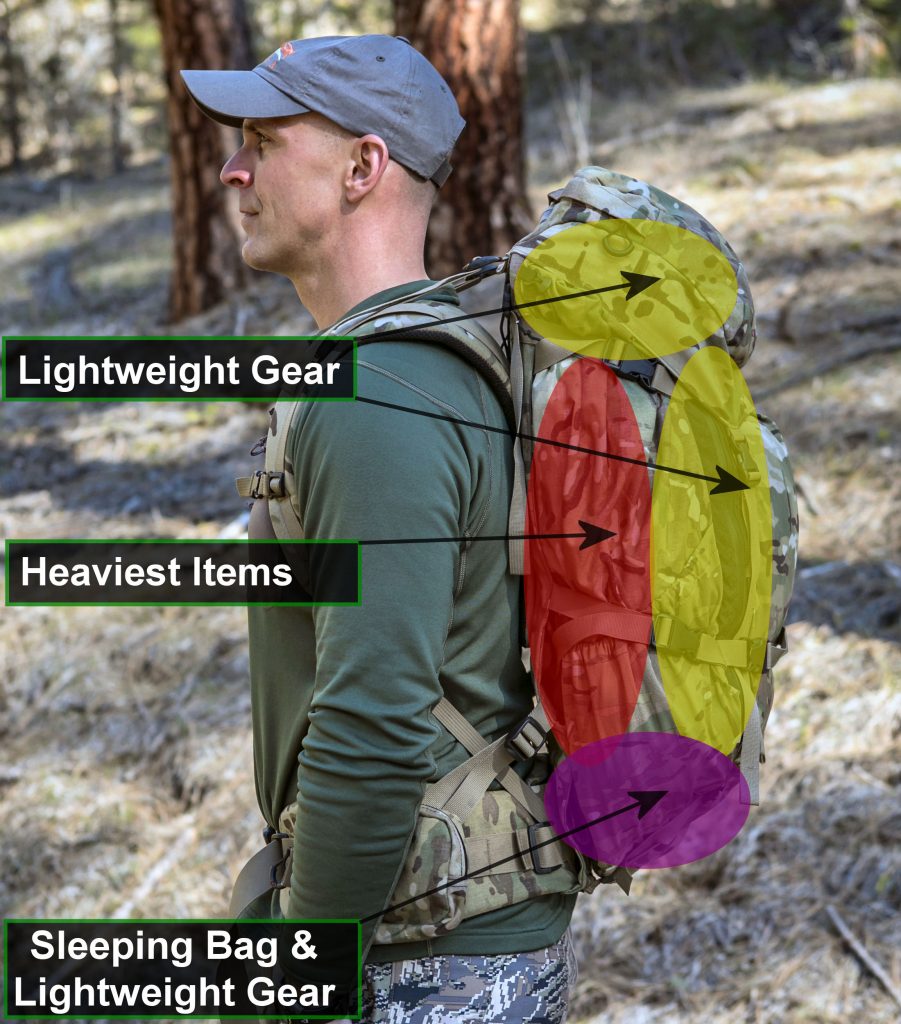
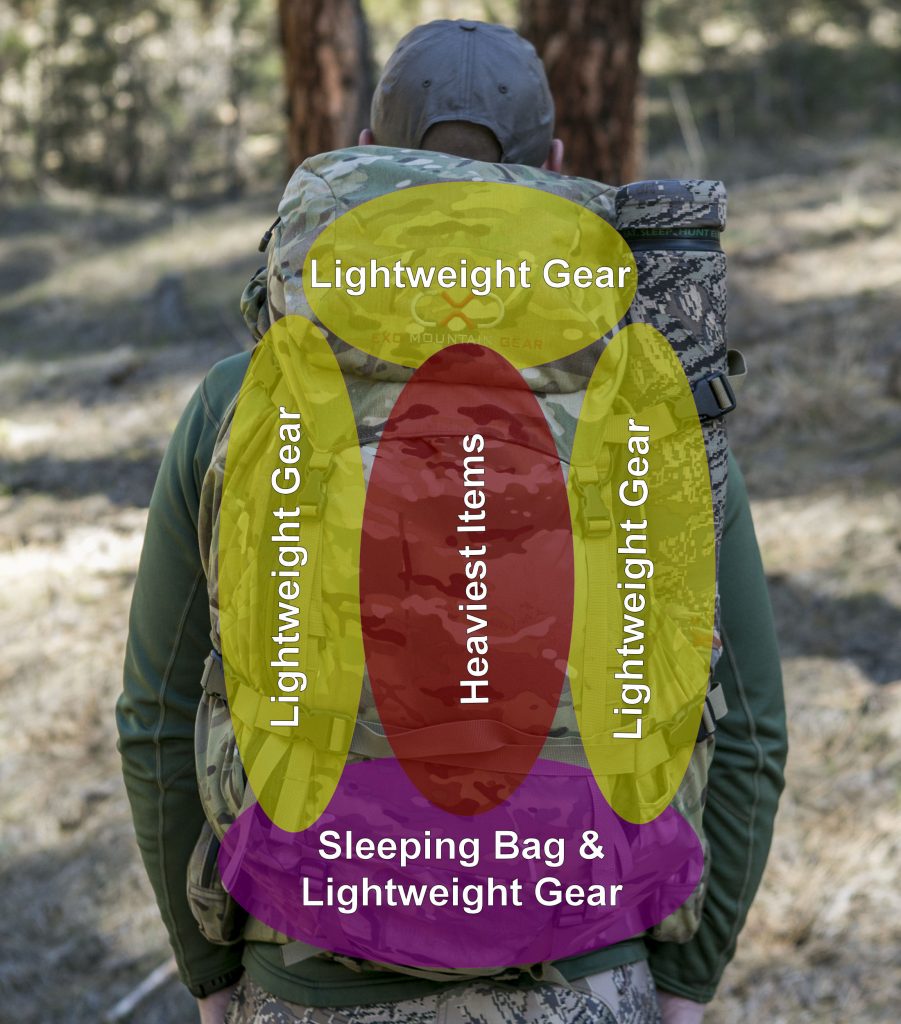
The main point to always remember is that heavier items should always be centered in your pack for a balanced load. The goal is to create a predictable, comfortable pack carry. Fortunately, the placement of the load can be adjusted on most packs.
Freighter packs have a rigid shelf, while most bivy style packs have some kind of a strap system that allows the load to be secured and adjusted as needed. Keeping the load centered as close to your spine as possible will reduce fatigue on your body and keep the load from shifting and creating continual imbalances.
LOADED UP
With a proper understanding of fit and balance of your pack, you can now load it up with elk meat and head out. Elk meat will usually make up at least 75% of your total pack weight, so you always want the meat to be placed as close to your back as possible. If I am carrying the heavy hind quarters, I want the center of mass of that quarter (around the ham) to be sitting just above the waist belt of the pack. If the meat is boned out, I lay it on the pack so I can distribute the weight of the meat vertically along the pack, rather than allowing it to bunch up at the bottom of the pack.
Either way, it’s important to be able to adjust the location of these heavy loads within the pack. Most packs that are made for hauling heavy loads have some kind of a meat shelf or adjustable straps that allow you to precisely situate the load.
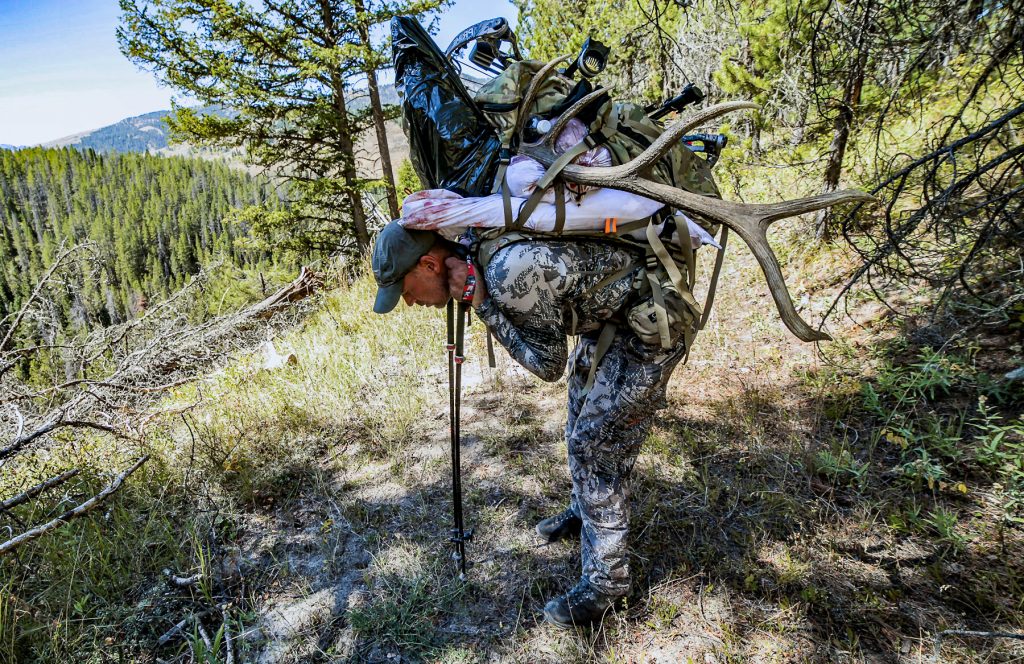
Some packs allow for the removal of the main backpack from the frame for attaching meat directly to the frame, with adjustments for securing the pack along the frame. This helps keep the meat close to your back and keeps your hunting gear clean. The bag (with your gear) can then be attached over the meat to allow the heavier items to stay against your back. If your pack doesn’t allow for the meat to be placed between the frame and the main bag, and you have to attach the meat to the outside of the pack, do that first. Then strap on your extra gear (clothing, weapon, etc.) to the outside of the meat and the pack.
Regardless of the pack used, compression is crucial in keeping the load in place. If the load of meat keeps migrating down into the bottom of the pack and shifting its center of gravity, the pack becomes less comfortable and less stable. This will require more energy from you. Just like loading gear, keeping the meat vertical and as close to your spine as possible lowers leverage on your back and requires less energy input to maintain balance.
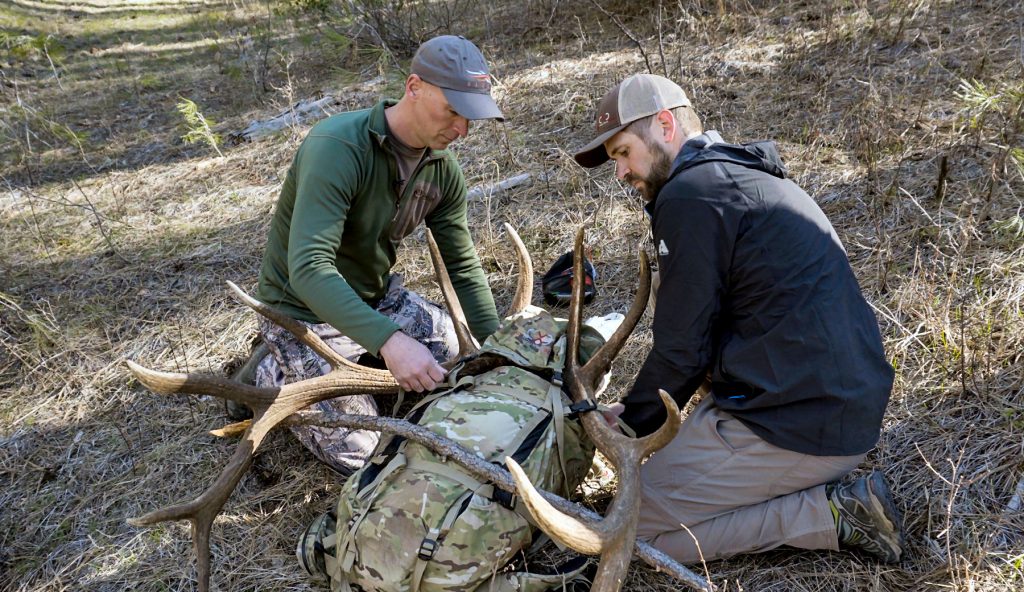
In addition to the straps that come with the pack, I always carry a few bungee cords on my packs as well to secure the meat to the pack and keep it from moving. As you add more meat to the pack, it increases the distance from the center of mass of the meat to your back, which increases the difficulty of the pack. Try to keep the meat as close to your back as you can.
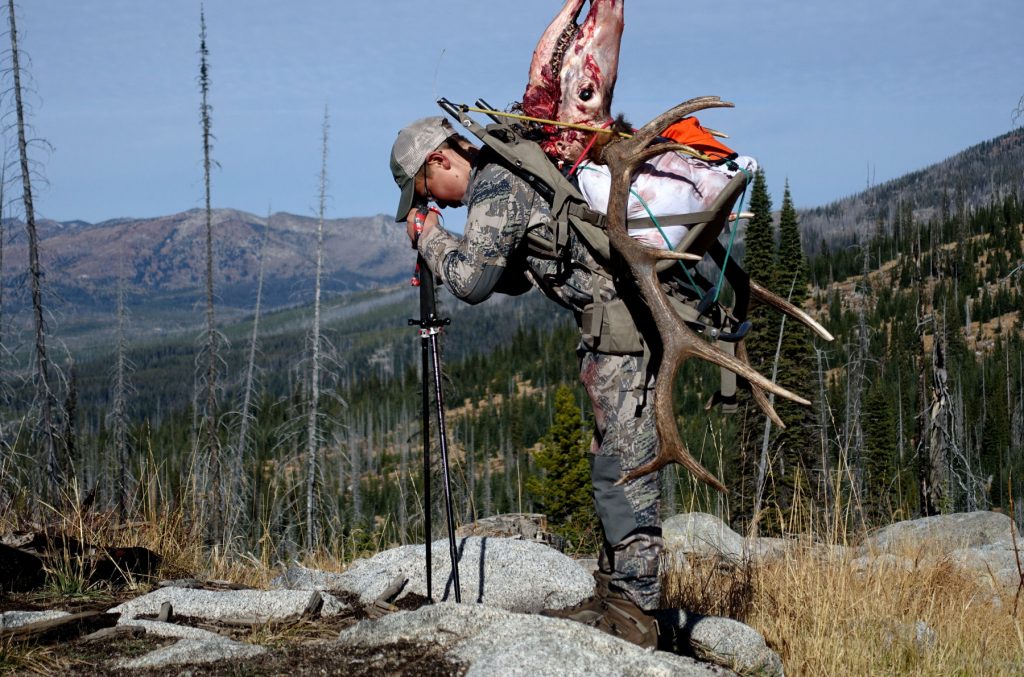
Lastly, attach your antlers to the pack. Attaching the antlers can be tricky, and antlers bouncing around on your pack can cause some serious issues. Each packout seems to be different, but I have found that carrying the antlers with the tips down and facing away from me works well for the most part.
I usually set the base of the skull on top of the quarter or meat, and secure the skull to the pack. Then, I’ve found it helpful to find a small, sturdy stick to run perpendicularly across the pack under the antlers. This allows me to secure the antlers to the pack and prevent them from rotating around and moving throughout the hike. There have been times when I’ve had to attach the head near the bottom of the pack and carry it with the antlers pointing up (long main beams that dig into the ground as you’re walking down a steep hill). Regardless of how you pack the antlers, always be sure to properly flag them so another hunter doesn’t misidentify you as a bull elk.
FINDING COMFORT
Finding comfort – especially on a heavy pack out – is a relative term. Again, physical conditioning is going to determine a great deal of your comfort when you are loaded down with heavy loads of elk meat. The proper fit of your pack, and the proper balance of the load is also going to play a large part in how far you are able to carry the loads.
I find myself frequently adjusting the shoulder straps during really heavy pack-outs. Tightening the shoulder straps will put more of the load on your shoulders, and allow your hips to relax for a few minutes. Then, loosening the shoulder straps will put more of the load back onto your waist and give your shoulders and upper back a break.
Lastly, I have discovered the miracle of trekking poles in recent years. A couple of lightweight, compact trekking poles will do wonders in helping keep your balance when you are burdened with a heavy load. Stepping over logs, navigating side hills, and just generally hiking out is made easier by the use of trekking poles. I don’t use the poles continually during the hunt, but they are always in my pack and definitely worth the extra ounces once I have loaded a heavy pack and placed it on my back.
SUMMARY
Everyone will have their system for packing elk meat that works for them, and that system usually comes after several unpleasant experiences. In the end – or, rather, in the beginning – it’s important to be prepared and know your limitations. There is a big difference between comfort zones and limitations though. Your comfort zones will likely be stretched when you pack out an elk. Exceeding your limitations, on the other hand, can turn into the loss of elk meat or injury. Always be prepared and have a game plan ahead of time. And, be sure you have tested your game plan under realistic conditions before you actually need it.
Click ‘Next Module’ Below to Continue to Module 15: Post-Rut & Late-Season Elk Hunting


